Recipes
Baked Chicken Wings Recipe
These baked chicken wings turn crisp and deeply golden in the oven without deep-frying. A short air-drying step, a wire rack, and high heat help the skin render while the meat stays juicy.
Overview
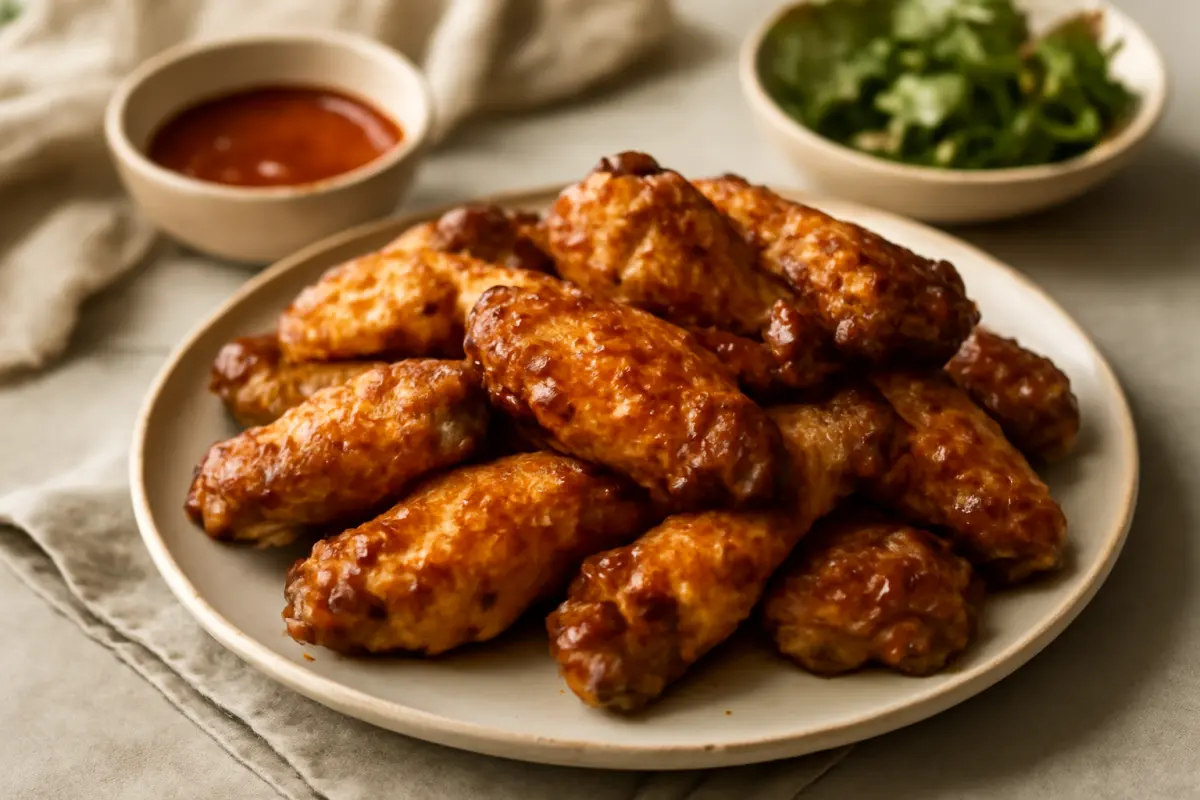
These baked chicken wings are crisp at the edges, juicy inside, and easy to make in a standard oven. The wings are seasoned with garlic, paprika, salt, and pepper, then baked on a rack so hot air can circulate around the chicken.
For the best texture, pat the wings very dry before seasoning and leave space between each piece. They are ready when the skin is deeply browned and the thickest part reaches 165°F. Serve them plain, with a dipping sauce, or toss them with your favorite wing sauce just before serving.
Ingredients
Makes 4 servings
- 2 pounds chicken wing sections, separated into flats and drumettes, with wing tips removed
- 1 tablespoon baking powder, preferably aluminum-free
- 1 teaspoon fine sea salt or table salt
- 1 teaspoon smoked paprika or sweet paprika
- 1 teaspoon garlic powder
- ½ teaspoon onion powder
- ½ teaspoon freshly ground black pepper
- 1 tablespoon neutral oil, such as avocado, canola, or vegetable oil
- Optional: ½ cup buffalo sauce, barbecue sauce, or other prepared wing sauce, for serving
- Optional: celery sticks, carrot sticks, ranch dressing, or blue cheese dressing
How to make it
Prepare the oven and pan. Position an oven rack in the upper-middle part of the oven and heat the oven to 425°F. Line a large rimmed baking sheet with foil for easier cleanup. Set a wire rack over the sheet and lightly brush or spray the rack with oil.
Dry the wings thoroughly. Use paper towels to pat the chicken wings dry on all sides. This step matters: surface moisture creates steam, which can leave the skin soft instead of crisp. If you have time, arrange the dry wings on a plate or rack and refrigerate them uncovered for 1 to 8 hours.
Season the chicken. In a small bowl, stir together the baking powder, salt, paprika, garlic powder, onion powder, and black pepper. Put the wings in a large bowl, drizzle with the oil, and toss to coat. Sprinkle in the seasoning mixture and toss again until every piece has a thin, even coating.
Arrange the wings. Place the wings skin-side up on the prepared rack. Leave a little space between pieces; if they touch, trapped steam can soften the skin. Use a second baking sheet if necessary rather than crowding the pan.
Bake the first side. Bake for 25 minutes. The skin should look lightly browned and beginning to tighten, and some fat should have collected on the baking sheet.
Turn and continue baking. Carefully turn each wing with tongs. Bake for 20 to 25 minutes more, or until the skin is crisp and deep golden brown. The thickest part of the meat, measured away from the bone, should register at least 165°F on an instant-read thermometer. For more tender, slightly more rendered wings, you can continue baking until they reach about 175°F to 185°F; watch closely so the skin does not burn.
Sauce, if desired. Transfer the hot wings to a clean bowl. Add the sauce a little at a time and toss until coated. For wings that stay crispest, serve the sauce on the side or toss immediately before eating. Rest the unsauced wings for 5 minutes before serving so the surface stays hot and crisp.
Expert tips
- Do not skip drying: Even a small amount of water on the skin can delay browning. Pat the wings dry again if they look damp after sitting in the bowl.
- Use baking powder, not baking soda: Baking powder helps the skin brown and crisp. Baking soda is much stronger and can leave a bitter, soapy taste.
- Avoid crowding: A packed pan traps steam. Two racks or two sheet pans will give better results than forcing all the wings onto one pan.
- For uneven browning: Rotate the baking sheet front to back after the first 25 minutes. Ovens often have hotter areas.
- If the skin is pale: Continue baking in 5-minute increments. If the meat is already at a safe temperature but the skin needs color, move the pan closer to the broiler for 1 to 2 minutes, watching constantly.
- If the wings are greasy or soft: The oven may be overcrowded, or the rack may be too low. Move the wings to a clean rack if needed and finish at 450°F for 5 to 10 minutes, checking frequently.
- For frozen wings: Thaw them completely in the refrigerator before cooking. Frozen wings release too much water for this method and will not brown evenly.
Serving and storage
Serve the wings hot with buffalo, barbecue, honey mustard, or another sauce. Add celery and carrot sticks with ranch or blue cheese dressing for a simple platter.
Refrigerate leftover wings in a covered container within 2 hours of cooking. They keep for up to 4 days in the refrigerator. Reheat them on a wire rack at 400°F for about 10 to 15 minutes, turning once, until hot and the skin has regained some crispness. Avoid sealing hot wings in a container, since trapped steam quickly softens the coating.
Frequently asked questions
How do you make baked chicken wings crispy?
Pat the wings completely dry, coat them lightly with baking powder and seasoning, place them on a wire rack, and leave space between pieces. Bake at 425°F until deeply browned and crisp, turning once halfway through.
Should chicken wings be baked covered or uncovered?
Bake them uncovered. Covering the wings traps steam and makes the skin soft rather than crisp.
How long do chicken wings take to bake at 425°F?
Most 2-pound batches take 45 to 50 minutes at 425°F, including one turn halfway through. Cooking time varies with wing size, so check that the thickest meat reaches at least 165°F and that the skin is browned.
Can I use frozen chicken wings for this recipe?
Thaw the wings completely in the refrigerator first. Frozen wings release excess moisture and are likely to steam instead of becoming crisp.
Why did my baked wings turn out soggy?
Common causes are wet skin, an overcrowded pan, or baking directly in the juices rather than on a rack. Dry the wings well, leave space between them, and use a rack so air can circulate.